Branding and Influencer
Categorising Your Influencer Page
© Victor Zissou / Pexels
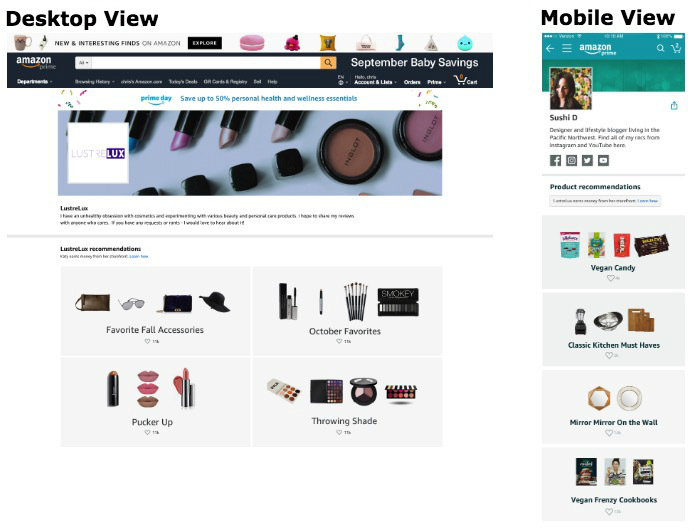
You can now create categories on your page, helping your followers find and shop for your favourite products and recommendations. To get started, login to Amazon.co.uk with the e-mail address you used to sign up for the Influencer Program.
- Go to your vanity page (www.amazon.co.uk/shop/YourHandle).You can simply type it in to your browser.
- You will see an “owner view.” We have made your existing list your first category, but you will likely want to modify and re-name it. To do this, click on the pencil underneath the list name. Change the name of the list and add a description. Note: the owner view is just for you. Once you change the name of the list, it will update in the public view as well. If you see other lists on your page, it’s because you have created Idea Lists in the past. You can choose to keep these lists on your page or delete them.
- Any Idea Lists you create under this account will be rendered on your Influencer storefront as well.
Creating a new Idea List:
- To make a new list, click on the ‘Create an Idea List’ button on the owner view of your page.
- Add products to your list. There are two ways to do this:
- Type into the search bar to see products that match the search. Click the + in the upper left corner to add the product to your list.
- You can also go to a specific product page on Amazon.com, find the “Add to List” button under Add to Cart, and add the product to the list name you just created.
Add captions to products:
- You can add captions to products you recommend by clicking the speech bubble in the upper right corner of the product.
Share your Idea Lists:
- You can now share individual categories and lists with your followers in addition to your vanity URL.
- Go to the individual list you’d like to share and click on the “share your list” buttons in the upper right-hand side of the list section. The square on the right is for the URL. Share this when you want to share a specific list.
- DO NOT just cut and paste from the browser, as this will break the attribution and hinder your ability to earn.
Owner View benefits:
- In the owner view you can also edit your storefront. You will be taken to Associate’s Central where you can upload a custom background image, edit your store description and your social media links.
- You can also view reporting. This link will take you to Associates Central where you can view your earnings.
How to add lists to your storefront video
Contents